Complete Guide to MVC in PHP: How it Works and How to Implement It
The MVC (Model-View-Controller) pattern is one of the most widely used approaches in web development, especially in PHP. In this article, we’ll go over how to implement MVC in a pure PHP project without using frameworks like Laravel or Symphony. We’ll break down each component of MVC and how they interact, while also exploring examples and best practices.
1. What is the MVC Pattern and Why is It Important in PHP?
1.1. Defining MVC: Model, View, Controller

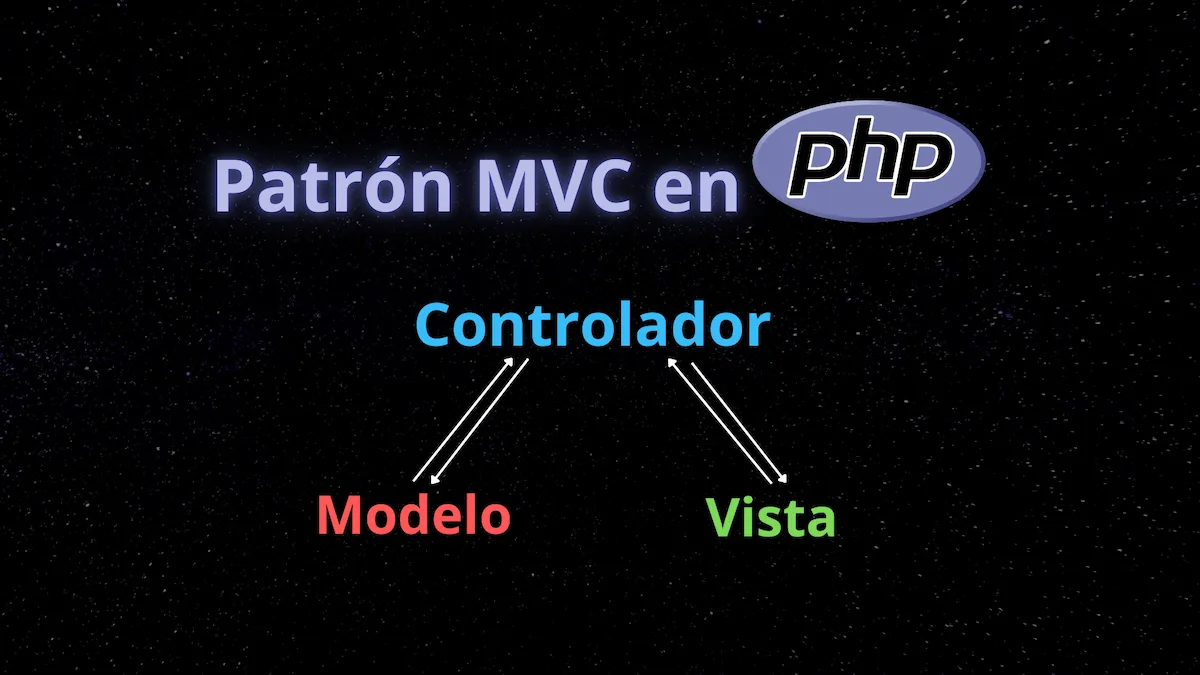
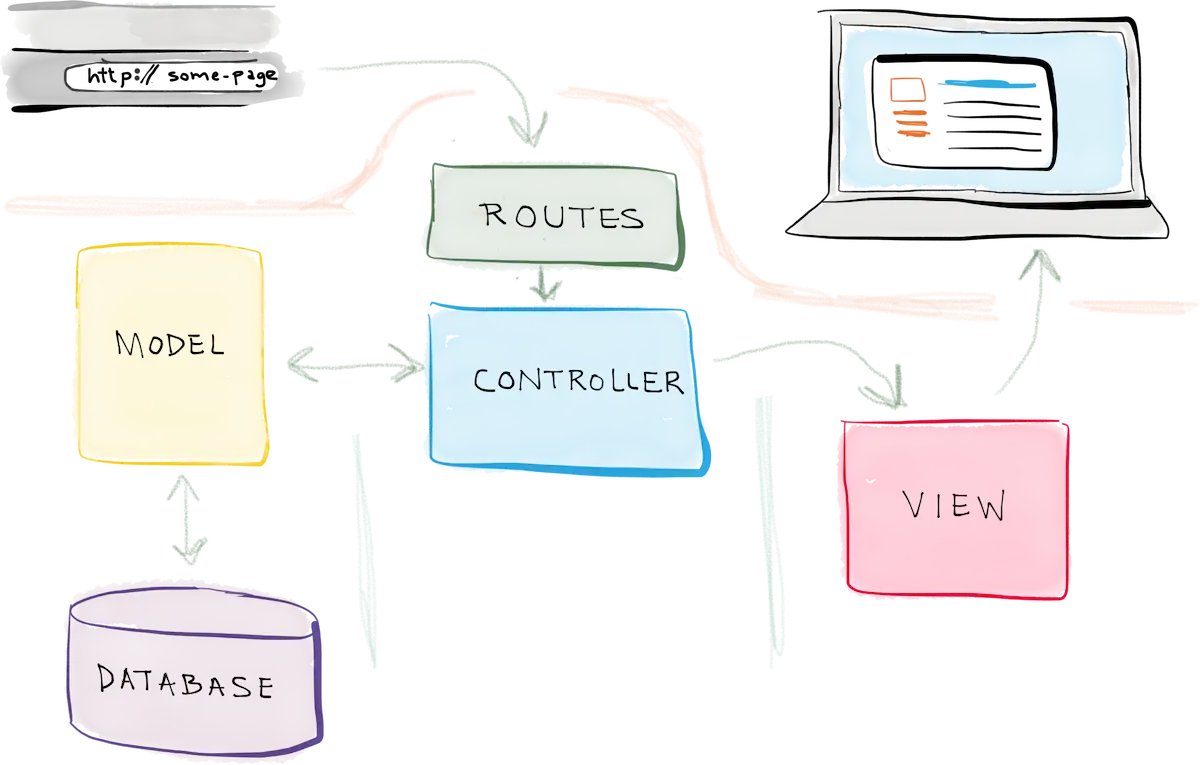
The MVC pattern is a software architecture that organizes code into three main components: Model, View, and Controller. This separation keeps your code clean, modular, and easy to maintain.
- Model: Handles the business logic and data management. It interacts with the database and contains application rules.
- View: Responsible for presenting data to the user. This could be an HTML file, templates, or even JSON, depending on the application type.
- Controller: Acts as the mediator between the view and the model. It receives user requests, processes logic in the model, and returns the appropriate output through the view.
1.2. Benefits of Using MVC in PHP Projects
MVC offers several key benefits in PHP development:
- Separation of concerns: Dividing the application into three components makes it easier to maintain and scale.
- Code reusability: Reuse the same model or view across multiple controllers or actions, saving time and effort.
- Modularity: Adds new features without impacting other system parts.
These features are especially useful in larger applications or long-term projects that need to scale.
2. Basic Structure of an MVC Project
A well-structured MVC project in PHP should have a clear folder separation for models, views, and controllers. A typical structure might look like this:
/php-mvc-example
|
|-- .htaccess  # URL config for Apache servers
|
|-- /public  # Browser-accessible public files
|   |-- /css
|   |   |-- global.css
|   |-- /js
|   |   |-- script.js
|   |-- /images
|   |-- index.php  # Entry point with Router implementation
|
|-- /src
|   |-- /Controllers
|   |   |-- UserController.php
|   |-- /Core
|   |   |-- config.php
|   |   |-- Controller.php
|   |   |-- Database.php
|   |-- /Models
|   |   |-- User.php
|   |-- /Routes
|   |   |-- Router.php
|   |   |-- routes.php
|   |-- /Templates
|   |   |-- header.php
|   |   |-- footer.php
|   |-- /Views
|       |-- /users
|           |-- create.php
|           |-- edit.php
|           |-- list.php
|
|-- /vendor  # Generated by Composer
|-- composer.json  # Composer dependencies and config
- public: Contains all assets accessible by the browser: CSS files, JavaScript, images, etc., plus
index.php, which implements the router and serves as the application’s entry point. - public/index.php: This is the main entry point. All requests are redirected here, and the router determines the controller and method based on the user’s request.
- src: Holds all source code. It’s organized to follow MVC, keeping the code clean and scalable.
- src/Core/: Essential classes and configurations for the project, such as base classes like
Controllerand theDatabaseclass with database connection settings. - src/Controllers/: Contains all application controllers. These handle user requests, interact with the corresponding model, and return the appropriate view.
- src/Routes/: Holds the router and all application routes in
routes.php. - src/Models/: Contains models responsible for business logic and database interactions.
- src/Views/: Contains PHP files for the presentation layer, responsible for displaying data to the user.
- src/Templates/: Contains reusable pieces of PHP or HTML for multiple views.
3. Entry Point index.php
As mentioned, public/index.php implements the router, so every request passes through here, and the router communicates with controllers.
// php:public/index.php
<?php
require_once '../vendor/autoload.php';
require_once '../src/Core/config.php';
require_once '../src/Routes/routes.php';
This file simply includes the following:
autoload.php: For proper Composer functionality.config.php: Configuration for global variables.routes.php: Defines the routes as we’ll see later.
Ensure the server recognizes index.php as the entry point. Here, we use the Apache web server on XAMPP, so we’ve added the following .htaccess config file at the project root:
// apache:.htaccess
RewriteEngine On
RewriteBase /php-mvc-example/
RewriteCond %{THE_REQUEST} /public/([^\s?]*) [NC]
RewriteRule ^ %1 [L,NE,R=302]
RewriteCond %{REQUEST_FILENAME} !-f
RewriteCond %{REQUEST_FILENAME} !-d
RewriteRule ^ public/index.php [L]
RewriteRule ^((?!public/).*)$ public/$1 [L,NC]
4. Implementing the Router
The router analyzes the request URL and determines the appropriate controller and action to execute. It maps a URL to a controller and action and can capture additional URL parameters for the controller.
// php:src/Routes/Router.php
<?php
namespace App\Routes;

class Router
{
    protected $routes = [];

    public function add($method, $url, $action)
    {
        $this->routes[$method][$url] = $action;
    }

    public function handleRequest()
    {
        $requestUrl = $_SERVER['REQUEST_URI'];
        $requestMethod = $_SERVER['REQUEST_METHOD'];

        // Parse URL
        $url = explode('/', $requestUrl);
        $url = array_slice($url, 2);
        $requestUrl = '/' . implode('/', $url);

        $requestUrl = strtok($requestUrl, '?');

        if (isset($this->routes[$requestMethod][$requestUrl])) {
            list($controllerName, $methodName) = explode('@', $this->routes[$requestMethod][$requestUrl]);
            $controllerName = "App\\Controllers\\" . $controllerName;
            $controller = new $controllerName();
            return $controller->$methodName();
        }

        echo "Page not found.";
    }
}
With the router, you can use two main methods:
add: Adds routes based on request type (usually GET or POST).handleRequest: Runs on each request and communicates with the controller throughindex.php. NOTE: Since we’re using XAMPP on Apache, we had to parse the URL. This may vary depending on your web server.
5. Core Elements of the Application
5.1. The Controller Class
Each controller extends from a base Controller class:
// php:src/core/Controller.php
<?php
namespace App\Core;

class Controller
{
    public function view($view, $data = [])
    {
        extract($data);
        require_once "../src/Views/$view.php";
    }

    public function model($model)
    {
        $modelClass = "App\\Models\\$model";
        return new $modelClass();
    }
}
Two essential methods for all controllers:
view: Renders a view file fromsrc/Views/. You can also pass in data as an associative array (e.g.,$data = ['users' => $user->getAll()]).model: Similar to theviewmethod but loads models fromsrc/Models/.
5.2. The Database Class
Models often need to interact with a database, but it’s better to centralize database configuration in a separate class:
// php:src/Core/Database.php
<?php
namespace App\Core;
use PDO;
use PDOException;

class Database
{
    private $host = 'localhost';
    private $db_name = 'my_db';
    private $username = 'root';
    private $password = '';
    public $conn;

    public function connect()
    {
        $this->conn = null;
        try {
            $this->conn = new PDO('mysql:host

=' . $this->host . ';dbname=' . $this->db_name, $this->username, $this->password);
            $this->conn->setAttribute(PDO::ATTR_ERRMODE, PDO::ERRMODE_EXCEPTION);
        } catch (PDOException $exception) {
            echo "Connection error: " . $exception->getMessage();
        }
        return $this->conn;
    }
}
Then, in each model, we will make the connect method execute prior to each query.
Remember, we’re structuring a very basic MVC framework to get our project started. In this case, $host, $db_name, $username, and $password should ideally be defined using environment variables to enhance security, but for development, we don’t need to overcomplicate things.
If you’re not using a MySQL database, you’ll need to change the connection URL in $this->conn = new PDO(DATABASE_URL);. For more information, you can refer to the PDO documentation.
5.3. The User Model
In this example, we’ll create a User model. Models in MVC handle data operations and represent business logic. This model interacts with the Database class to access the database:
// php:src/Models/User.php
<?php
namespace App\Models;
use App\Core\Database;
use PDO;

class User
{
    private $conn;
    private $table = 'users';

    public function __construct()
    {
        $database = new Database();
        $this->conn = $database->connect();
    }

    public function getAll()
    {
        $query = "SELECT * FROM $this->table";
        $stmt = $this->conn->prepare($query);
        $stmt->execute();
        return $stmt->fetchAll(PDO::FETCH_ASSOC);
    }

    public function create($data)
    {
        $query = "INSERT INTO $this->table (name, email) VALUES (:name, :email)";
        $stmt = $this->conn->prepare($query);
        $stmt->bindParam(':name', $data['name']);
        $stmt->bindParam(':email', $data['email']);
        return $stmt->execute();
    }
}
The model offers two essential methods:
getAll: Retrieves all users from theuserstable.create: Inserts a new user into theuserstable using provided data.
5.4. The UserController
The controller handles logic for user actions. It receives the user request, interacts with the model, and decides which view to show:
// php:src/Controllers/UserController.php
<?php
namespace App\Controllers;
use App\Core\Controller;
use App\Models\User;

class UserController extends Controller
{
    public function list()
    {
        $user = $this->model('User');
        $users = $user->getAll();
        return $this->view('users/list', ['users' => $users]);
    }

    public function create()
    {
        if ($_SERVER['REQUEST_METHOD'] === 'POST') {
            $user = $this->model('User');
            $user->create($_POST);
            header('Location: /users');
        }
        return $this->view('users/create');
    }
}
Two main actions in this controller:
list: Retrieves all users and sends them to thelistview.create: Handles user creation if the request method is POST, then redirects to the list of users.
5.5. Views (list.php and create.php)
Finally, views are responsible for presenting information. We’ll add a list.php file to show all users and a create.php file to create new users.
List View
// php:src/Views/users/list.php
<!DOCTYPE html>
<html>
<head>
    <title>User List</title>
</head>
<body>
    <h1>Users</h1>
    <a href="/users/create">Add New User</a>
    <ul>
        <?php foreach ($users as $user): ?>
            <li><?php echo $user['name'] . " (" . $user['email'] . ")"; ?></li>
        <?php endforeach; ?>
    </ul>
</body>
</html>
Create View
// php:src/Views/users/create.php
<!DOCTYPE html>
<html>
<head>
    <title>Create User</title>
</head>
<body>
    <h1>Create User</h1>
    <form method="POST" action="/users/create">
        <label>Name:</label>
        <input type="text" name="name" required>
        <label>Email:</label>
        <input type="email" name="email" required>
        <button type="submit">Save User</button>
    </form>
</body>
</html>
6. Configuring Routes
Finally, define application routes in routes.php. Each route links a URL path to a controller and action.
// php:src/Routes/routes.php
<?php
use App\Routes\Router;
use App\Controllers\UserController;

$router = new Router();

$router->add('GET', '/users', 'UserController@list');
$router->add('GET', '/users/create', 'UserController@create');
$router->add('POST', '/users/create', 'UserController@create');

$router->handleRequest();
In this setup:
GET /usersmaps toUserController@listto show all users.GET /users/createmaps toUserController@createto display the form.POST /users/createmaps to the same action for creating a new user.
7. Running the Project
- Database Setup: Make sure your database server is running and a
userstable exists. - Server Configuration: Start your server (e.g., Apache with XAMPP).
- Access the Application: Open
http://localhost/php-mvc-example/usersto see the user list orhttp://localhost/php-mvc-example/users/createto add a new user.
And that’s it! You now have a basic MVC application in PHP. This structure is scalable and modular, allowing you to add new features or improve existing functionality without major structural changes.
You might also be interested in

JSON Web Tokens (JWT): Essential Guide and Best Practices
What is a JSON Web Token? ️ Complete guide with a practical example in Node.js to create secure tokens and protect your app. ️